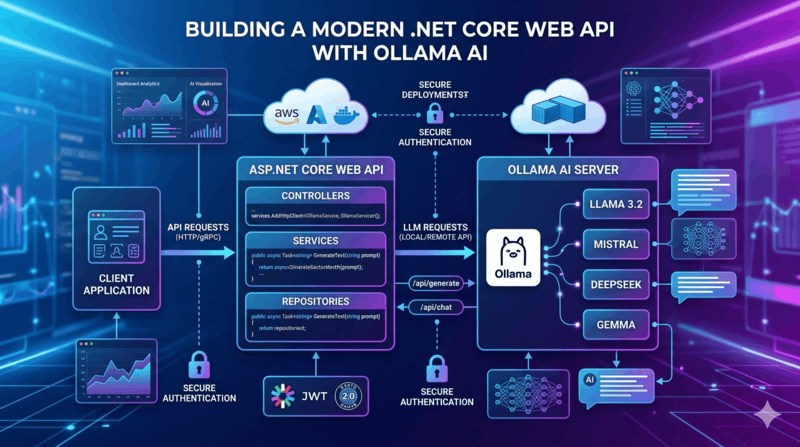
Ollama enables developers to run Large Language Models (LLMs) locally. However, many real-world applications require external access to these models through a public API.
Prerequisites
Before starting, ensure that:
- .NET 8 SDK is installed.
- Ollama is installed and running.
- At least one model is downloaded.
Check available models:
ollama listExample:
llama3.2
mistral
gemma3
deepseek-r1
Start Ollama:
ollama serveBy default, Ollama runs on:
http://localhost:11434Step 1: Create a .NET Core Web API
Create a new project:
dotnet new webapi -n OllamaPublicApi
cd OllamaPublicApi
Run the project:
dotnet runStep 2: Create Request Models
Create a folder named Models.
Models/ChatRequest.cs
namespace OllamaPublicApi.Models
{
    public class ChatRequest
    {
        // AI model name
        public string Model { get; set; }

        // User prompt
        public string Prompt { get; set; }
    }
}
Step 3: Register HttpClient
Open Program.cs.
// Create builder
var builder = WebApplication.CreateBuilder(args);

// Register controllers
builder.Services.AddControllers();

// Register HttpClient for API calls
builder.Services.AddHttpClient();

// Enable Swagger
builder.Services.AddEndpointsApiExplorer();
builder.Services.AddSwaggerGen();

var app = builder.Build();

// Enable Swagger UI
app.UseSwagger();
app.UseSwaggerUI();

// Map controllers
app.MapControllers();

// Run application
app.Run();
Step 4: Create Ollama Controller
Create a folder named Controllers.
Controllers/OllamaController.cs
using Microsoft.AspNetCore.Mvc;
using OllamaPublicApi.Models;
using System.Text;
using System.Text.Json;

namespace OllamaPublicApi.Controllers
{
    [ApiController]
    [Route("api/[controller]")]
    public class OllamaController : ControllerBase
    {
        // HttpClient factory instance
        private readonly IHttpClientFactory _httpClientFactory;

        // Constructor injection
        public OllamaController(IHttpClientFactory httpClientFactory)
        {
            _httpClientFactory = httpClientFactory;
        }

        [HttpPost("chat")]
        public async Task<IActionResult> Chat(ChatRequest request)
        {
            // Create HttpClient
            var client = _httpClientFactory.CreateClient();

            // Build Ollama request payload
            var payload = new
            {
                model = request.Model,
                prompt = request.Prompt,
                stream = false
            };

            // Convert object into JSON string
            var json = JsonSerializer.Serialize(payload);

            // Create HTTP content
            var content = new StringContent(
                json,
                Encoding.UTF8,
                "application/json");

            // Send request to Ollama API
            var response = await client.PostAsync(
                "http://localhost:11434/api/generate",
                content);

            // Read response body
            var result = await response.Content.ReadAsStringAsync();

            // Return response to client
            return Content(result, "application/json");
        }
    }
}
Step 5: Test Dynamic Model Selection
Request Using Llama
POST /api/ollama/chat
{
  "model": "llama3.2",
  "prompt": "Explain machine learning."
}
Request Using Mistral
{
  "model": "mistral",
  "prompt": "Explain machine learning."
}
Request Using DeepSeek
{
  "model": "deepseek-r1",
  "prompt": "Explain machine learning."
}
The API automatically forwards the selected model to Ollama.
Step 6: Create Model Listing Endpoint
Allow clients to discover available models.
Add the following method inside OllamaController.
[HttpGet("models")]
public async Task<IActionResult> GetModels()
{
    // Create HttpClient
    var client = _httpClientFactory.CreateClient();

    // Call Ollama tags endpoint
    var response = await client.GetAsync(
        "http://localhost:11434/api/tags");

    // Read response
    var result = await response.Content.ReadAsStringAsync();

    // Return model list
    return Content(result, "application/json");
}
Test:
GET /api/ollama/models
Example Response:
{
  "models": [
    {
      "name": "llama3.2"
    },
    {
      "name": "mistral"
    }
  ]
}
Step 7: Add API Key Security
Add the following code to the Chat method.
// Read API Key from request header
var apiKey = Request.Headers["X-API-KEY"].ToString();

// Validate API Key
if (apiKey != "my-secret-key")
{
    // Return unauthorized response
    return Unauthorized("Invalid API Key");
}
Client Request:
POST /api/ollama/chat
Headers:
X-API-KEY: my-secret-key
This prevents unauthorized access.
Step 8: Expose API Publicly
Option 1: Ngrok
Install Ngrok and run:
ngrok http 5000
Example:
https://abc123.ngrok-free.app
Public Endpoint:
https://abc123.ngrok-free.app/api/ollama/chat
Option 2: Deploy to Cloud
Deploy your application to:
- AWS EC2
- Azure Virtual Machine
- Google Cloud VM
- DigitalOcean
Install Ollama on the server:
ollama serve
Publish the .NET application:
dotnet publish -c Release
Run:
dotnet OllamaPublicApi.dll
Configure firewall and reverse proxy settings.
Recommended Models
| Model | Purpose |
|---|---|
| llama3.2 | General AI assistant |
| mistral | Fast responses |
| gemma3 | Lightweight applications |
| deepseek-r1 | Reasoning and coding |
| qwen3 | Multilingual tasks |
| codellama | Code generation |
Conclusion
Using ASP.NET Core and Ollama, you can quickly build a secure public AI API. The implementation allows clients to dynamically choose models, making it suitable for chatbots, AI assistants, content generation platforms, and enterprise AI solutions. By adding model discovery, API key authentication, and public deployment, you can create a production-ready AI service powered by locally hosted LLMs.