In modern web applications, APIs are constantly exposed to high traffic, bots, and malicious requests. Without protection, excessive requests can overload your server and degrade application performance.
This is where Rate Limiting becomes essential.
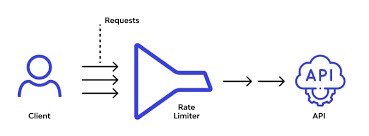
Rate limiting controls how many requests a client can make within a specified time window. It protects APIs from abuse, improves reliability, and ensures fair usage among users.
What is Rate Limiting?
Rate limiting restricts the number of API requests a client can make during a fixed time period.
Example:
100 requests per minuteIf the client exceeds the limit, the API returns:
HTTP 429 - Too Many RequestsWhy Use Rate Limiting?
Rate limiting provides several benefits:
- Prevents API abuse
- Protects against DDoS attacks
- Reduces server load
- Improves API stability
- Ensures fair resource usage
- Controls traffic spikes
Types of Rate Limiting
1. Fixed Window
Limits requests within a fixed time interval.
Example:
100 requests per minuteSimple and commonly used.
2. Sliding Window
Tracks requests dynamically over time for smoother limiting.
3. Token Bucket
Clients consume tokens for requests. Tokens refill over time.
Useful for burst traffic handling.
4. Concurrency Limiting
Limits how many requests can run simultaneously.
Prerequisites
Before starting, ensure you have:
- .NET 7 or later installed
- ASP.NET Core Web API project
- Basic knowledge of middleware
Create a .NET Core Web API
Run the following command:
dotnet new webapi -n RateLimitDemoNavigate to the project:
cd RateLimitDemoBuilt-in Rate Limiting in ASP.NET Core
Starting from .NET 7, ASP.NET Core provides built-in rate limiting middleware.
Namespace used:
using System.Threading.RateLimiting;Step 1: Configure Rate Limiting
Open Program.cs.
Add the following code:
using System.Threading.RateLimiting;

var builder = WebApplication.CreateBuilder(args);

builder.Services.AddControllers();

builder.Services.AddRateLimiter(options =>
{
    options.AddFixedWindowLimiter("fixed", config =>
    {
        config.PermitLimit = 5;
        config.Window = TimeSpan.FromSeconds(10);
        config.QueueProcessingOrder = QueueProcessingOrder.OldestFirst;
        config.QueueLimit = 2;
    });
});

var app = builder.Build();

app.UseRateLimiter();

app.MapControllers();

app.Run();
Understanding the Configuration
PermitLimit
config.PermitLimit = 5;Allows only 5 requests.
Window
config.Window = TimeSpan.FromSeconds(10);Within a 10-second window.
QueueLimit
config.QueueLimit = 2;Extra requests wait in queue.
QueueProcessingOrder
QueueProcessingOrder.OldestFirstProcesses oldest queued requests first.
Step 2: Apply Rate Limiting to Controller
Create a controller:
using Microsoft.AspNetCore.Mvc;
using Microsoft.AspNetCore.RateLimiting;

namespace RateLimitDemo.Controllers
{
    [ApiController]
    [Route("api/[controller]")]
    [EnableRateLimiting("fixed")]
    public class TestController : ControllerBase
    {
        [HttpGet]
        public IActionResult Get()
        {
            return Ok("Request Successful");
        }
    }
}
Step 3: Run the API
Start the application:
dotnet runTest endpoint:
GET /api/testAfter 5 requests within 10 seconds, you’ll receive:
429 Too Many RequestsGlobal Rate Limiting
Instead of applying per controller, you can apply globally.
Update middleware:
app.UseRateLimiter();And map endpoints with policy.
Sliding Window Example
You can also use sliding window rate limiting.
Example:
builder.Services.AddRateLimiter(options =>
{
    options.AddSlidingWindowLimiter("sliding", config =>
    {
        config.PermitLimit = 10;
        config.Window = TimeSpan.FromMinutes(1);
        config.SegmentsPerWindow = 6;
    });
});
This provides smoother request tracking.
Token Bucket Example
Useful for burst traffic.
builder.Services.AddRateLimiter(options =>
{
    options.AddTokenBucketLimiter("token", config =>
    {
        config.TokenLimit = 10;
        config.QueueProcessingOrder = QueueProcessingOrder.OldestFirst;
        config.QueueLimit = 5;
        config.ReplenishmentPeriod = TimeSpan.FromSeconds(10);
        config.TokensPerPeriod = 5;
        config.AutoReplenishment = true;
    });
});
Custom Response for Rate Limit Exceeded
You can customize the response when the limit is exceeded.
builder.Services.AddRateLimiter(options =>
{
    options.OnRejected = async (context, token) =>
    {
        context.HttpContext.Response.StatusCode = 429;

        await context.HttpContext.Response.WriteAsync(
            "Too many requests. Please try again later.",
            token);
    };
});
Best Practices
Use Different Policies
Different endpoints may need different limits.
Example:
- Login API → Strict limits
- Public APIs → Moderate limits
- Internal APIs → Relaxed limits
Combine with Authentication
Rate limit based on:
- IP Address
- User ID
- API Key
Monitor API Usage
Track:
- Rejected requests
- Traffic spikes
- Abuse patterns
Use tools like:
- Prometheus
- Grafana
- Application Insights
Common Challenges
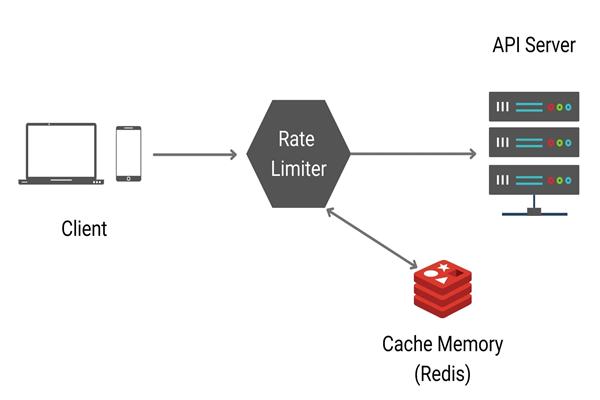
Distributed Systems
In multiple server environments, in-memory rate limiting may fail.
Solution:
- Redis-based distributed caching
- API Gateway rate limiting
Choosing Correct Limits
- Too strict → blocks real users
Too loose → ineffective protection
Rate Limiting with API Gateway
Many organizations implement rate limiting at the API Gateway level using:
- Kong
- NGINX
- YARP
- Azure API Management
- This centralizes traffic management across all APIs.
Conclusion
Rate limiting is a critical feature for securing and stabilizing APIs. ASP.NET Core makes implementation simple with built-in middleware introduced in .NET 7.
By applying proper rate limiting strategies, you can:
- Protect backend systems
- Prevent abuse
- Improve performance
- Ensure fair API usage
Whether you’re building small APIs or enterprise-scale microservices, implementing rate limiting should always be part of your API security strategy.
Final Thoughts
Modern APIs must be resilient, secure, and scalable. Rate limiting is one of the easiest yet most powerful ways to achieve that.
With ASP.NET Core’s built-in support, developers can implement production-ready rate limiting with minimal code while maintaining flexibility and performance.