Salesforce provides the Truncation for all the custom object which allows to Salesforce that delete all the records from particular objects and save the empty object and its metadata. Truncating a custom object permanently removes all of its records compared to Import Wizard and Data Import Wizard. This action will remove records from custom objects and you cannot recover them from the Recycle Bin.
Now, after the deletion, the truncated object copy will appear in the Deleted Objects list for 15 days. In this period the object and its records continue to count toward your organization’s limits and then the copied object and its records are permanently deleted.
To Enable the Truncate button for the Custom Objects:
For your organization to use this feature, you have to Enable the Truncation, to do this follow the instructions:
- Go to the Setup.
- Go to the Build section and select Customize.
- Here select the User Interface.
- Now, in the User Interface page, find the “Enable Custom Object Truncate” option in the Setup section and if it is not checked then check it. [See the Screenshot]
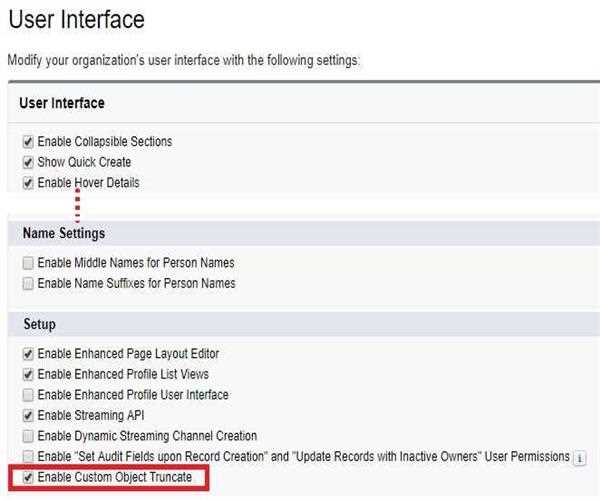
- Click on Save.
To Perform Truncate for the Custom Objects:
You can use this feature when you have created a custom object and fill it with test records. To delete those test records with a single action, you can use this feature.
To perform this action, follow these instructions:
- Go to the Setup.
- Go to the Build section and go to Create and select Objects option.
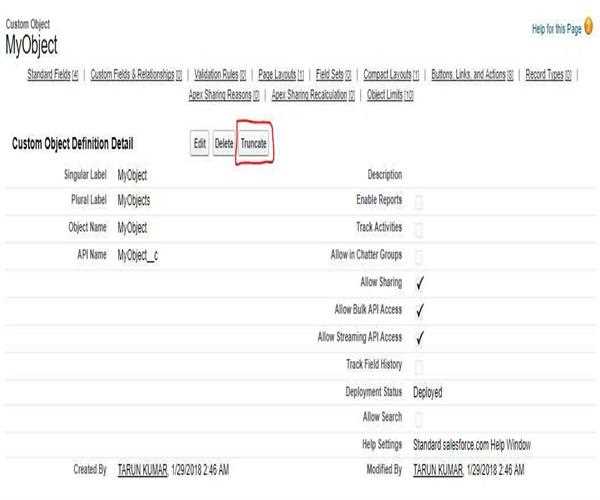
- In the Custom Object page, select the label of any Custom Object. In my example, I have selected “MyObject” label.
- Now, here you can see the “Truncate” button, click on the “Truncate” button. [See the Screenshot]
- A popup window will appear, read the warning message carefully and type the object name, in my case I have entered MyObject. [See the screenshot]
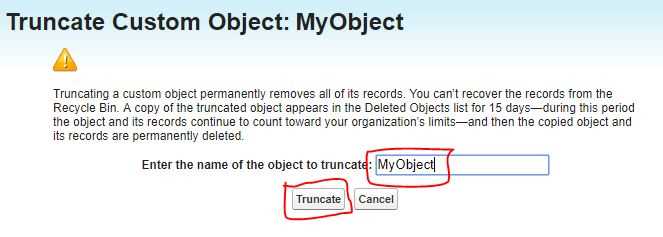
- To complete the process click on the “Truncate” button.
NOTE
When you truncate a custom object, Salesforce stores a copy of the truncated object in the deleted objects' list for 15 days, and it will count against your organization's limit. After 15 days, the records will be erased permanently and will no longer count against your limits.